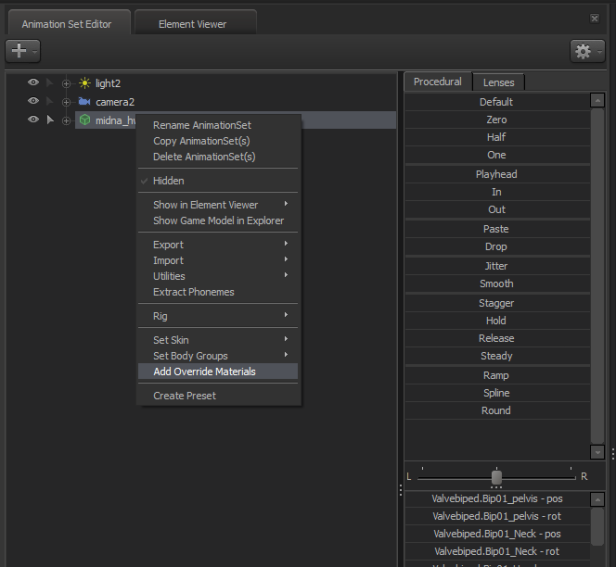
Step 1: Adding override materials
This is done by right clicking your model in the animation set editor and then choosing “Add Override Materials”
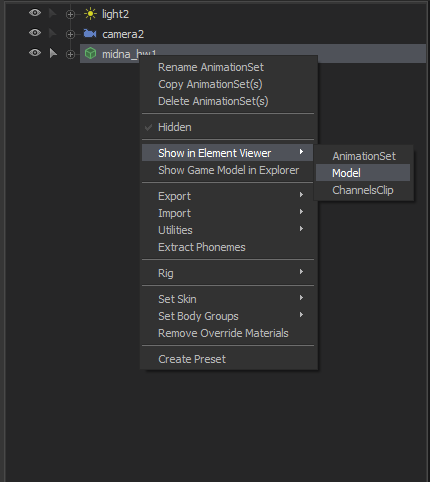
Step 2: Showing the model in the element viewer
Step 3: Adding the phongboost attribute
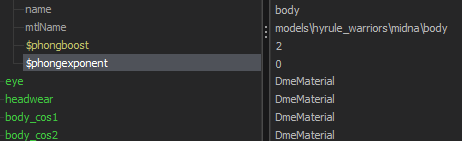
This is your element viewer
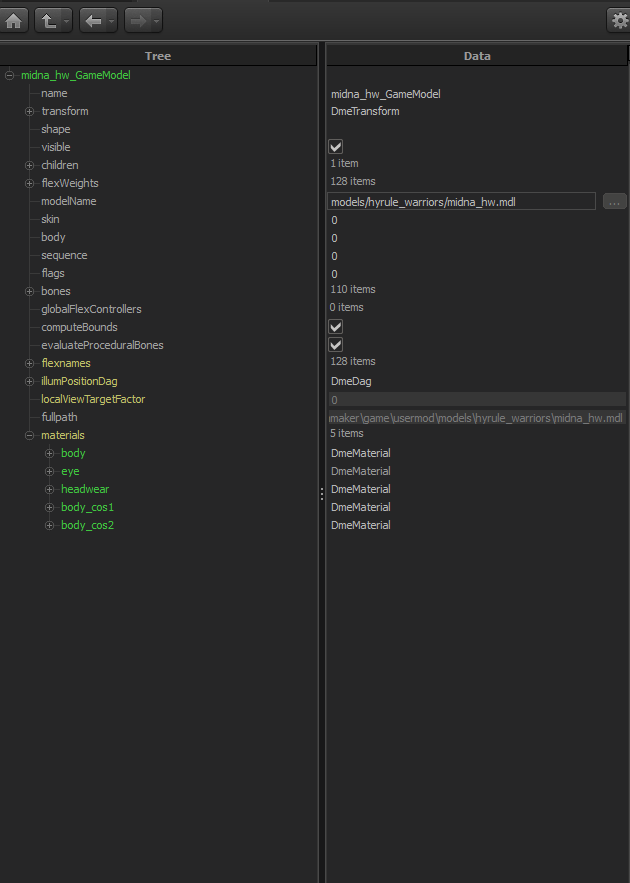
Open “materials” and choose the part of your model you want to make shiny. Most models only have one option here but characters can have multiple.
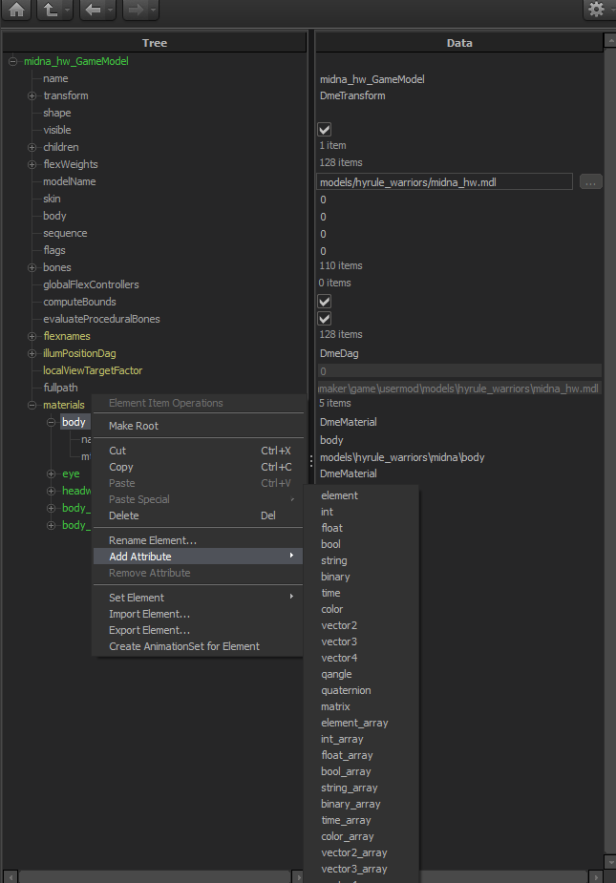
Right click the the elemt and click “Add Attribute” this will show you a large number of possible data types, but we will choose “float”.
A small window will open, giving us the option to choose the name for our attribute.
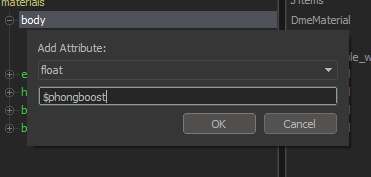
Type in “$phongboost” and click OK.
Change the number at the right of your float in the element viewer to change the strenght of the reflections.
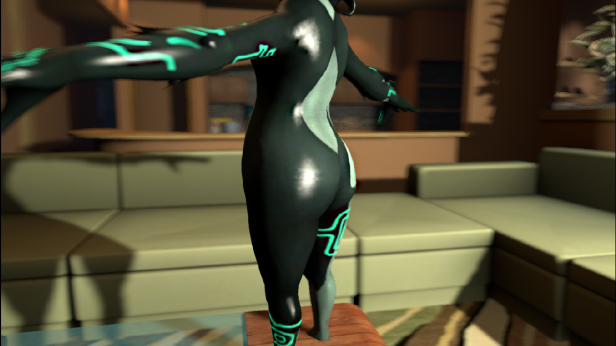
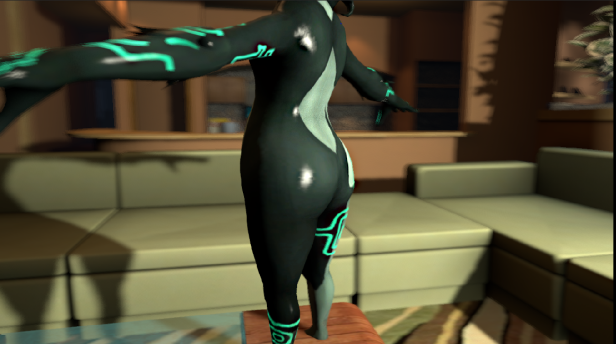
If you have done everything right, your model will now look something like this.
It is possible that your model doesn’t support phong, in that case this will not work.
Step 4 (optional): Changing the phong exponent
This will change how hard or soft the highlights on your model are.
Like in step 3, add a float, but name it “$phongexponent” instead.
The higher the number, the harder the highlights.